Home » Portfolio
Category Archives: Portfolio
About Me

I have a passion for interactive entertainment and technology, and am interested in creating and curating content for the modern world.
Exceptional language, writing, proofing, editing and speaking ability; eager to learn and apply new and varied skills. Extroverted and unafraid to create new connections, and has a proven ability to maintain and nurture professional networks.
Proof of Concept: Localizing a Unity Game
This semester at MIIS, we worked on some techniques for localizing games in Android, iOS, and Unity. While it certainly helps to know some coding for things like this, applications like Android Studio and the Unity Personal editor can go a long way to making anyone with a little computer knowledge an amateur software localizer.
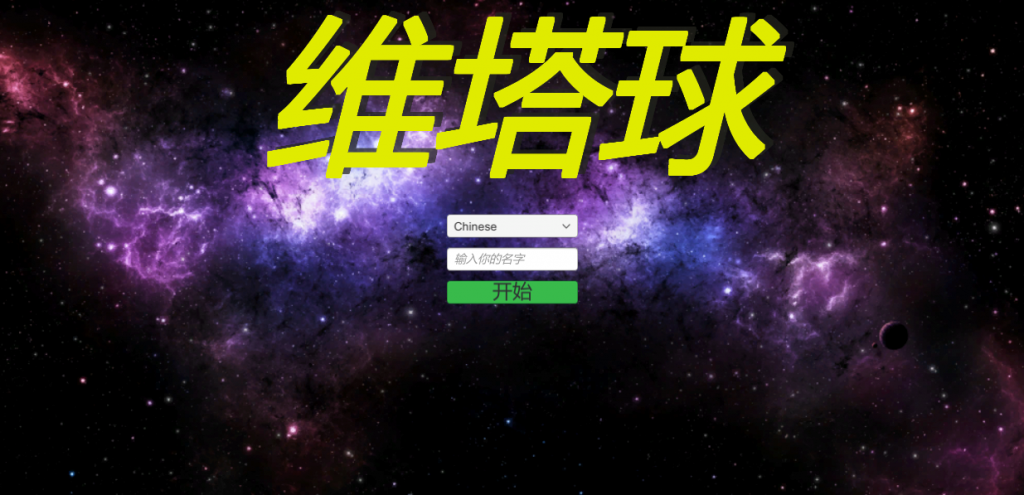
As a proof of concept for our final project, we worked on localizing an open-source game from English to Chinese, Japanese, and Italian. It took a while to find an open source game that worked and was appropriate for our needs, but we eventually settled on the game Terra Vita: a simple puzzle game created as part of the Global Game Jam. You can try out the game at this link if you like, or download the source code and edit it yourself.

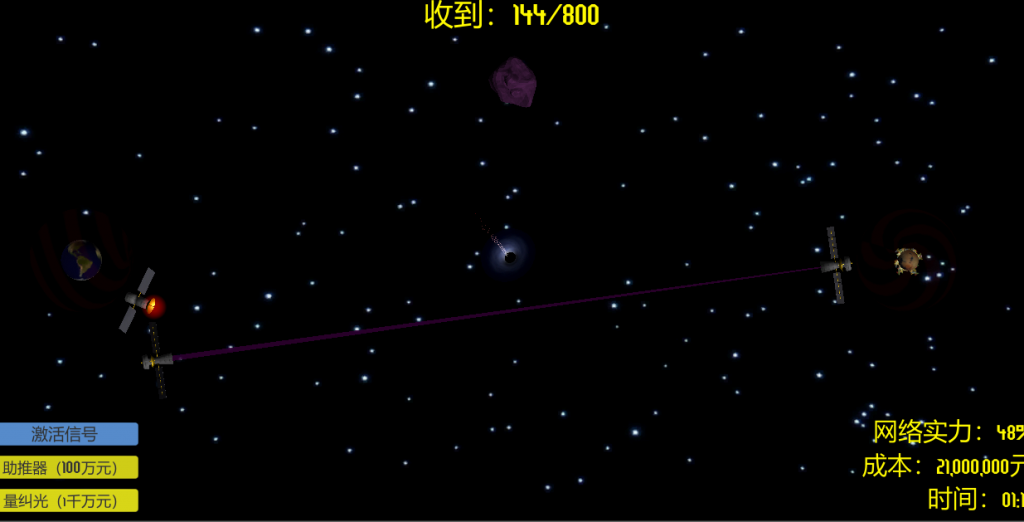
The point of the game is to use two different kinds of satellites to create a path for messages to travel from Earth to a distant planet to help with terraforming. But asteroids and black holes getting in the way means you have to be creative about the path you use, while also trying to keep your expenses under a budget.
It’s a bit buggy, and falls short of most of the mechanics; for example, there’s no actual penalty for going over budget, and the way that asteroids interfere with your path is inconsistent. Nevertheless, it’s an interesting premise and, for our purposes, perfect to localize, as it contains a variety of text and no language picker. Also, it’s free, so I can’t complain too much.

We started the process by identifying all of the translatable text in the game and extracting it. We fully expected there to be some images that needed localizing, but it turned out that the title screen and everything else was just formatted text, and so this part of the process was simple. However, there were some interesting bits of text in the code that pointed to screens of the game that were never shown when playing, so we removed those from the extracted text data.
Next came the translation. Since this was just a proof of concept, we only ran everything through Google Translate. However, the Japanese and Chinese translations resulted in some bad cases of text bleeding out of the text boxes or getting cut off, so we had to occasionally do some creative translation in parts to shorten everything up. When we absolutely could not shorten the translation any more through editing, we ended up simply making the text itself smaller.

Once the translation was finished, we put the translated text into the game using the I2 Localization Unity asset, a great tool for localizing within Unity. We also made sure to put a language picker on the title screen, which worked out well.


Another interesting challenge was getting all of the currency symbols and number formatting correct for the different locales. For example, we wanted the Chinese version to have the 元 currency symbol be on the right side of the number, instead of the left where the $ for English or ¥ for Japanese sign are.

The currency was set up in such a way that there was inconvenient concatenation within the code as seen above, but one of my group members cleverly got around that, and we eventually had a great looking game screen.

That’s the long and short of it! The whole thing worked great. I think if we were to do it over again, I’d like to do something that has some more opportunities for image editing. When we first started this, I thought we were going to need to recreate some of our own assets, but it ended up not being necessary; which is, of course, indicative of good internationalization practices, but I would have still liked the challenge. Next time!
Desktop Publishing Proof-of-Concept: Localizing a Japanese Children’s Book
Before coming to MIIS, I taught English in a little tourist town in Gifu Prefecture, Japan, called Gero. Gifu is a beautiful place, with amazing nature, fresh food, and — best of all — hot springs. It also, like many things in Japan, has a cute mascot: Minamo, the Water Fairy. A friendly character that brings happiness to everyone he encounters.

So, in an effort to let more people know about Minamo and, by association, Gifu Prefecture, I decided to localize the below children’s book featuring Minamo and famous sights around Gifu from Japanese to English. You can find the original book on Minamo’s official webpage (obviously he has one).

I’ll go into more detail about the process I took to localize the book, but first, the finished product:
![]()
I’m pleased with the result! It wasn’t a too difficult project, but it presented some interesting challenges.
The Process
This project can be broken up into a few distinct phases. They are:
To-Do
- Download all assets
- Prepare pages for translation
- Localize reading order
- Translate
- Insert back into website format
I wanted the final product to be as close to the original as possible, which meant recreating the simple webpage that it is embedded in. I didn’t have access to the original files, but masking out the text wasn’t too difficult, as it’s mostly on a white background with just a few sentences overlapping the pictures. In some places the text was quite narrow because of the vertical orientation of the Japanese writing. And, being a Japanese book, the layout was right-to-left, which meant reworking the page numbers and the order that the pages appeared within the website.
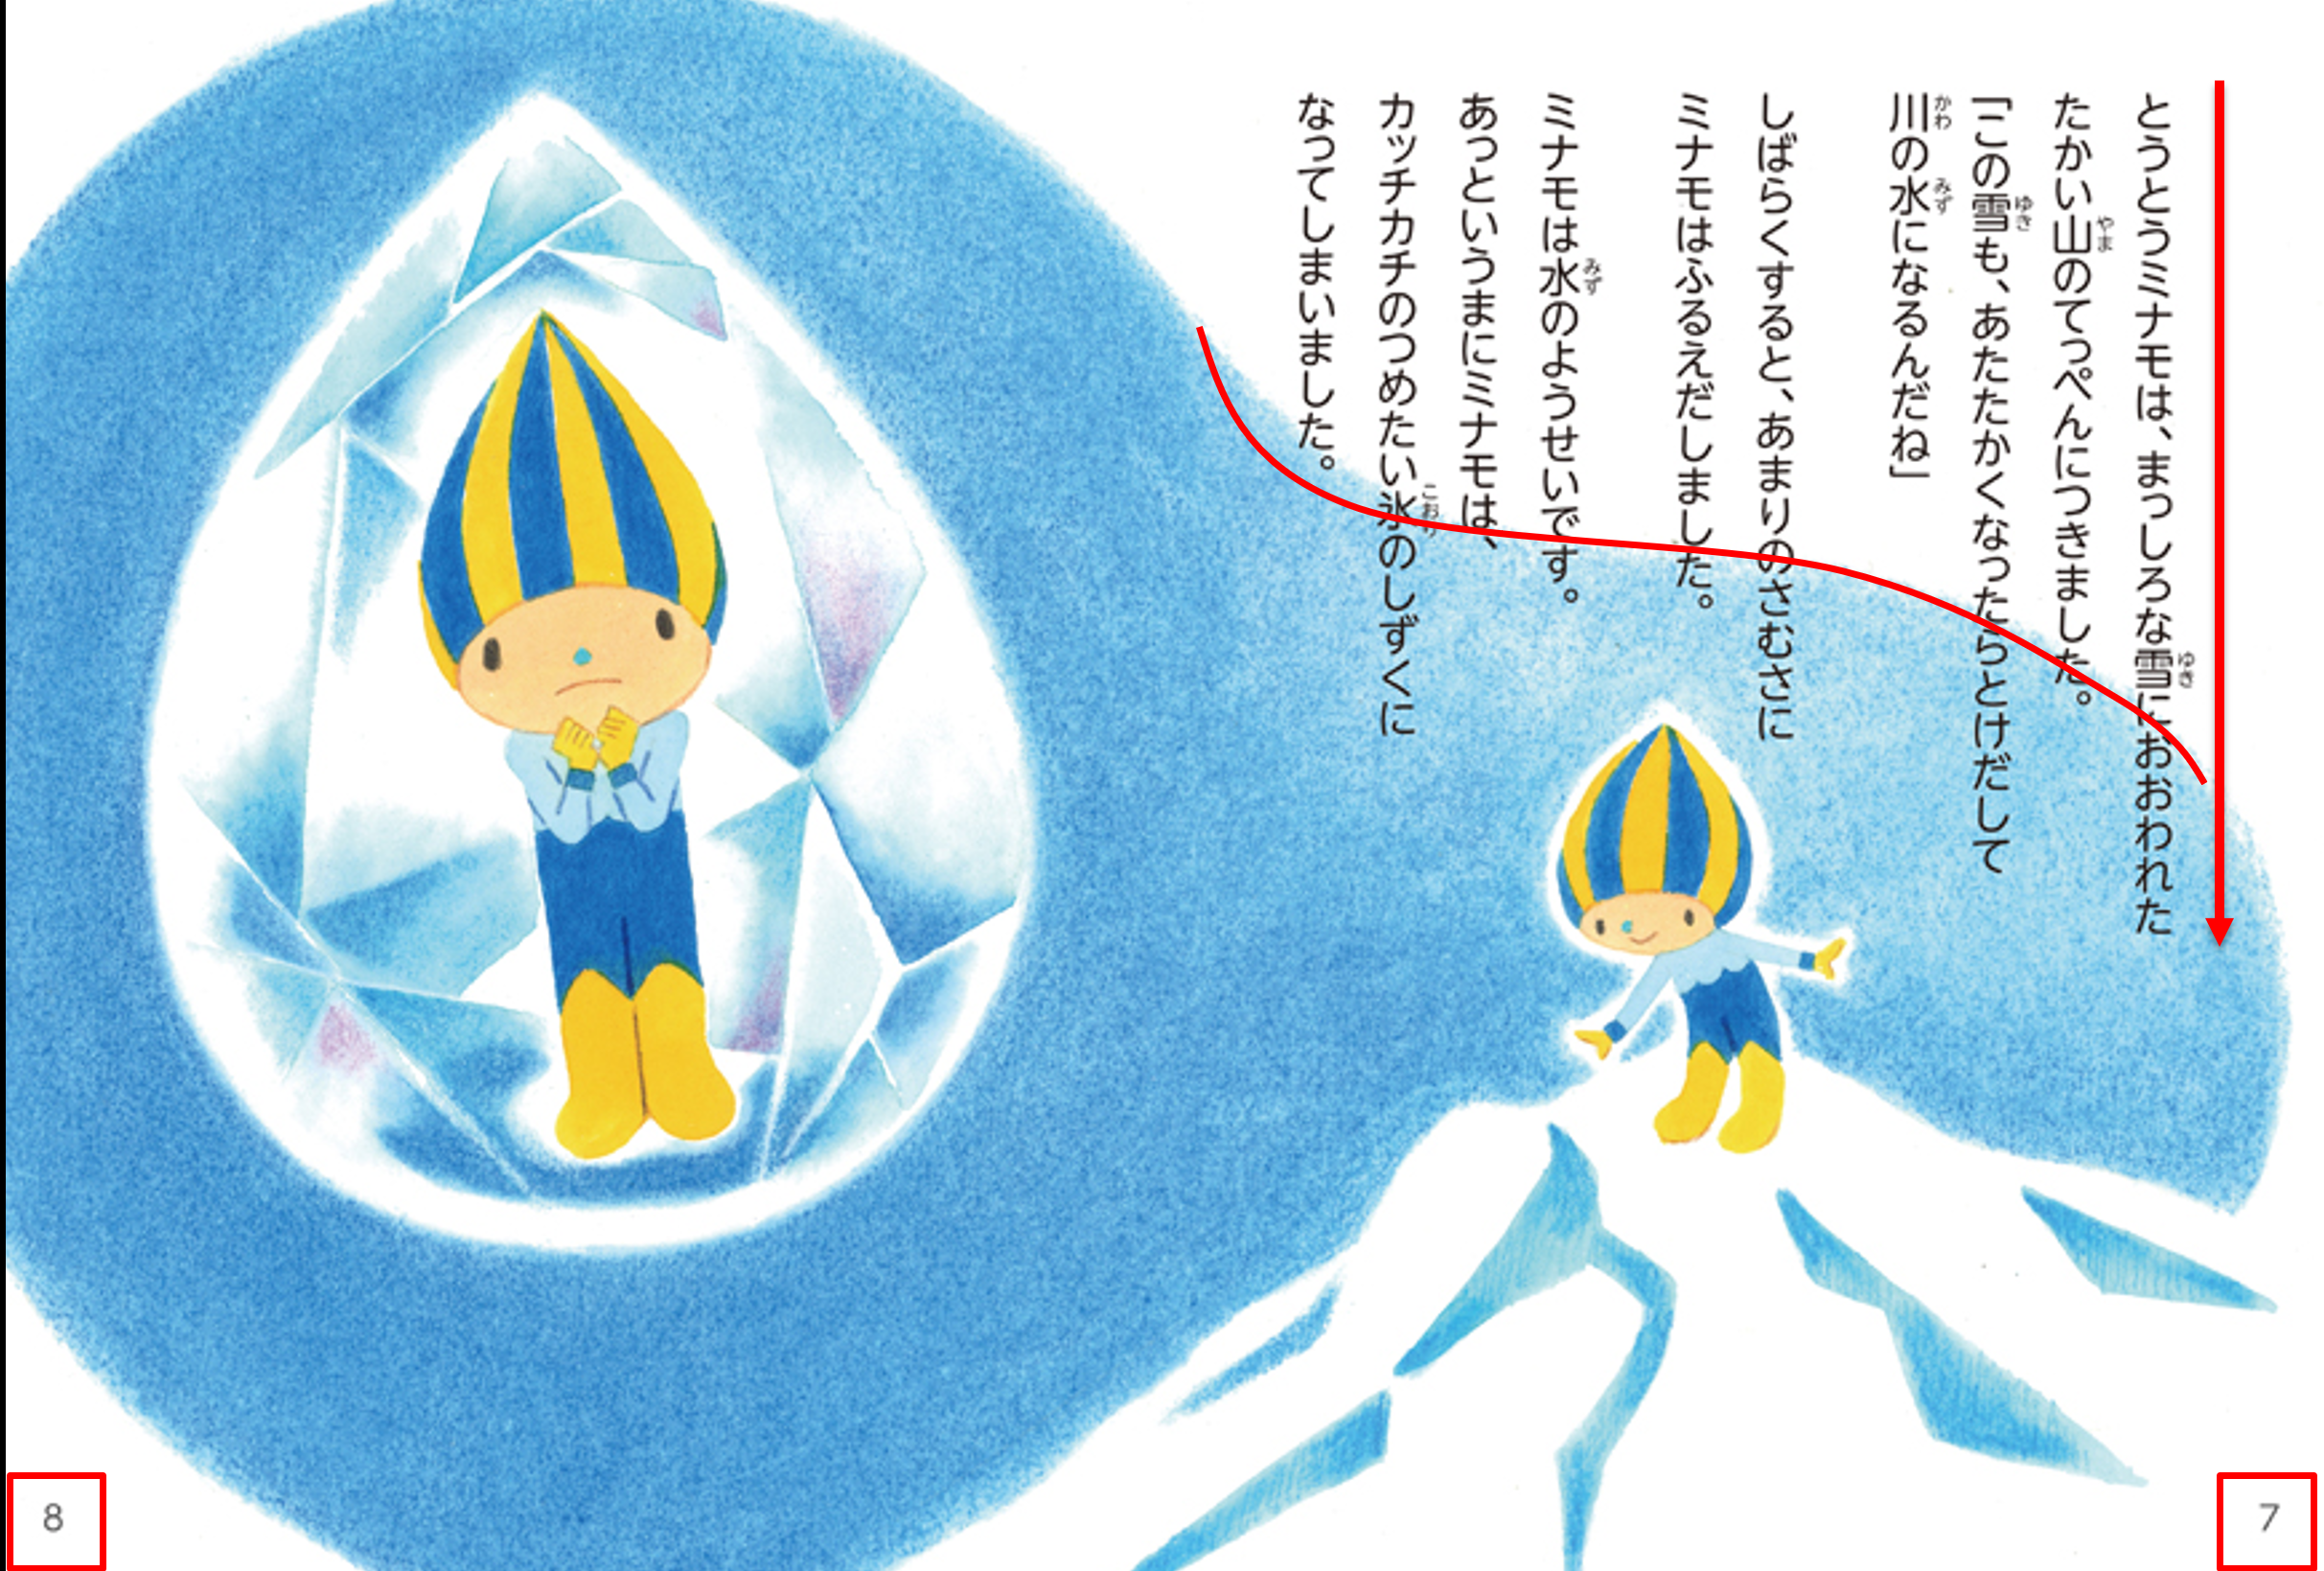
The last page of the book is a map of Gifu with short descriptions of famous places. This map features a few different fonts and lots of small text, and so took a little longer to localize. Finally, the cover page had some characters separated into little bubbles — a practice that looks fine in Japanese, but wouldn’t work well in English. You can see below a comparison — Japanese on left, English on right — showing how I chose to localize these pages.

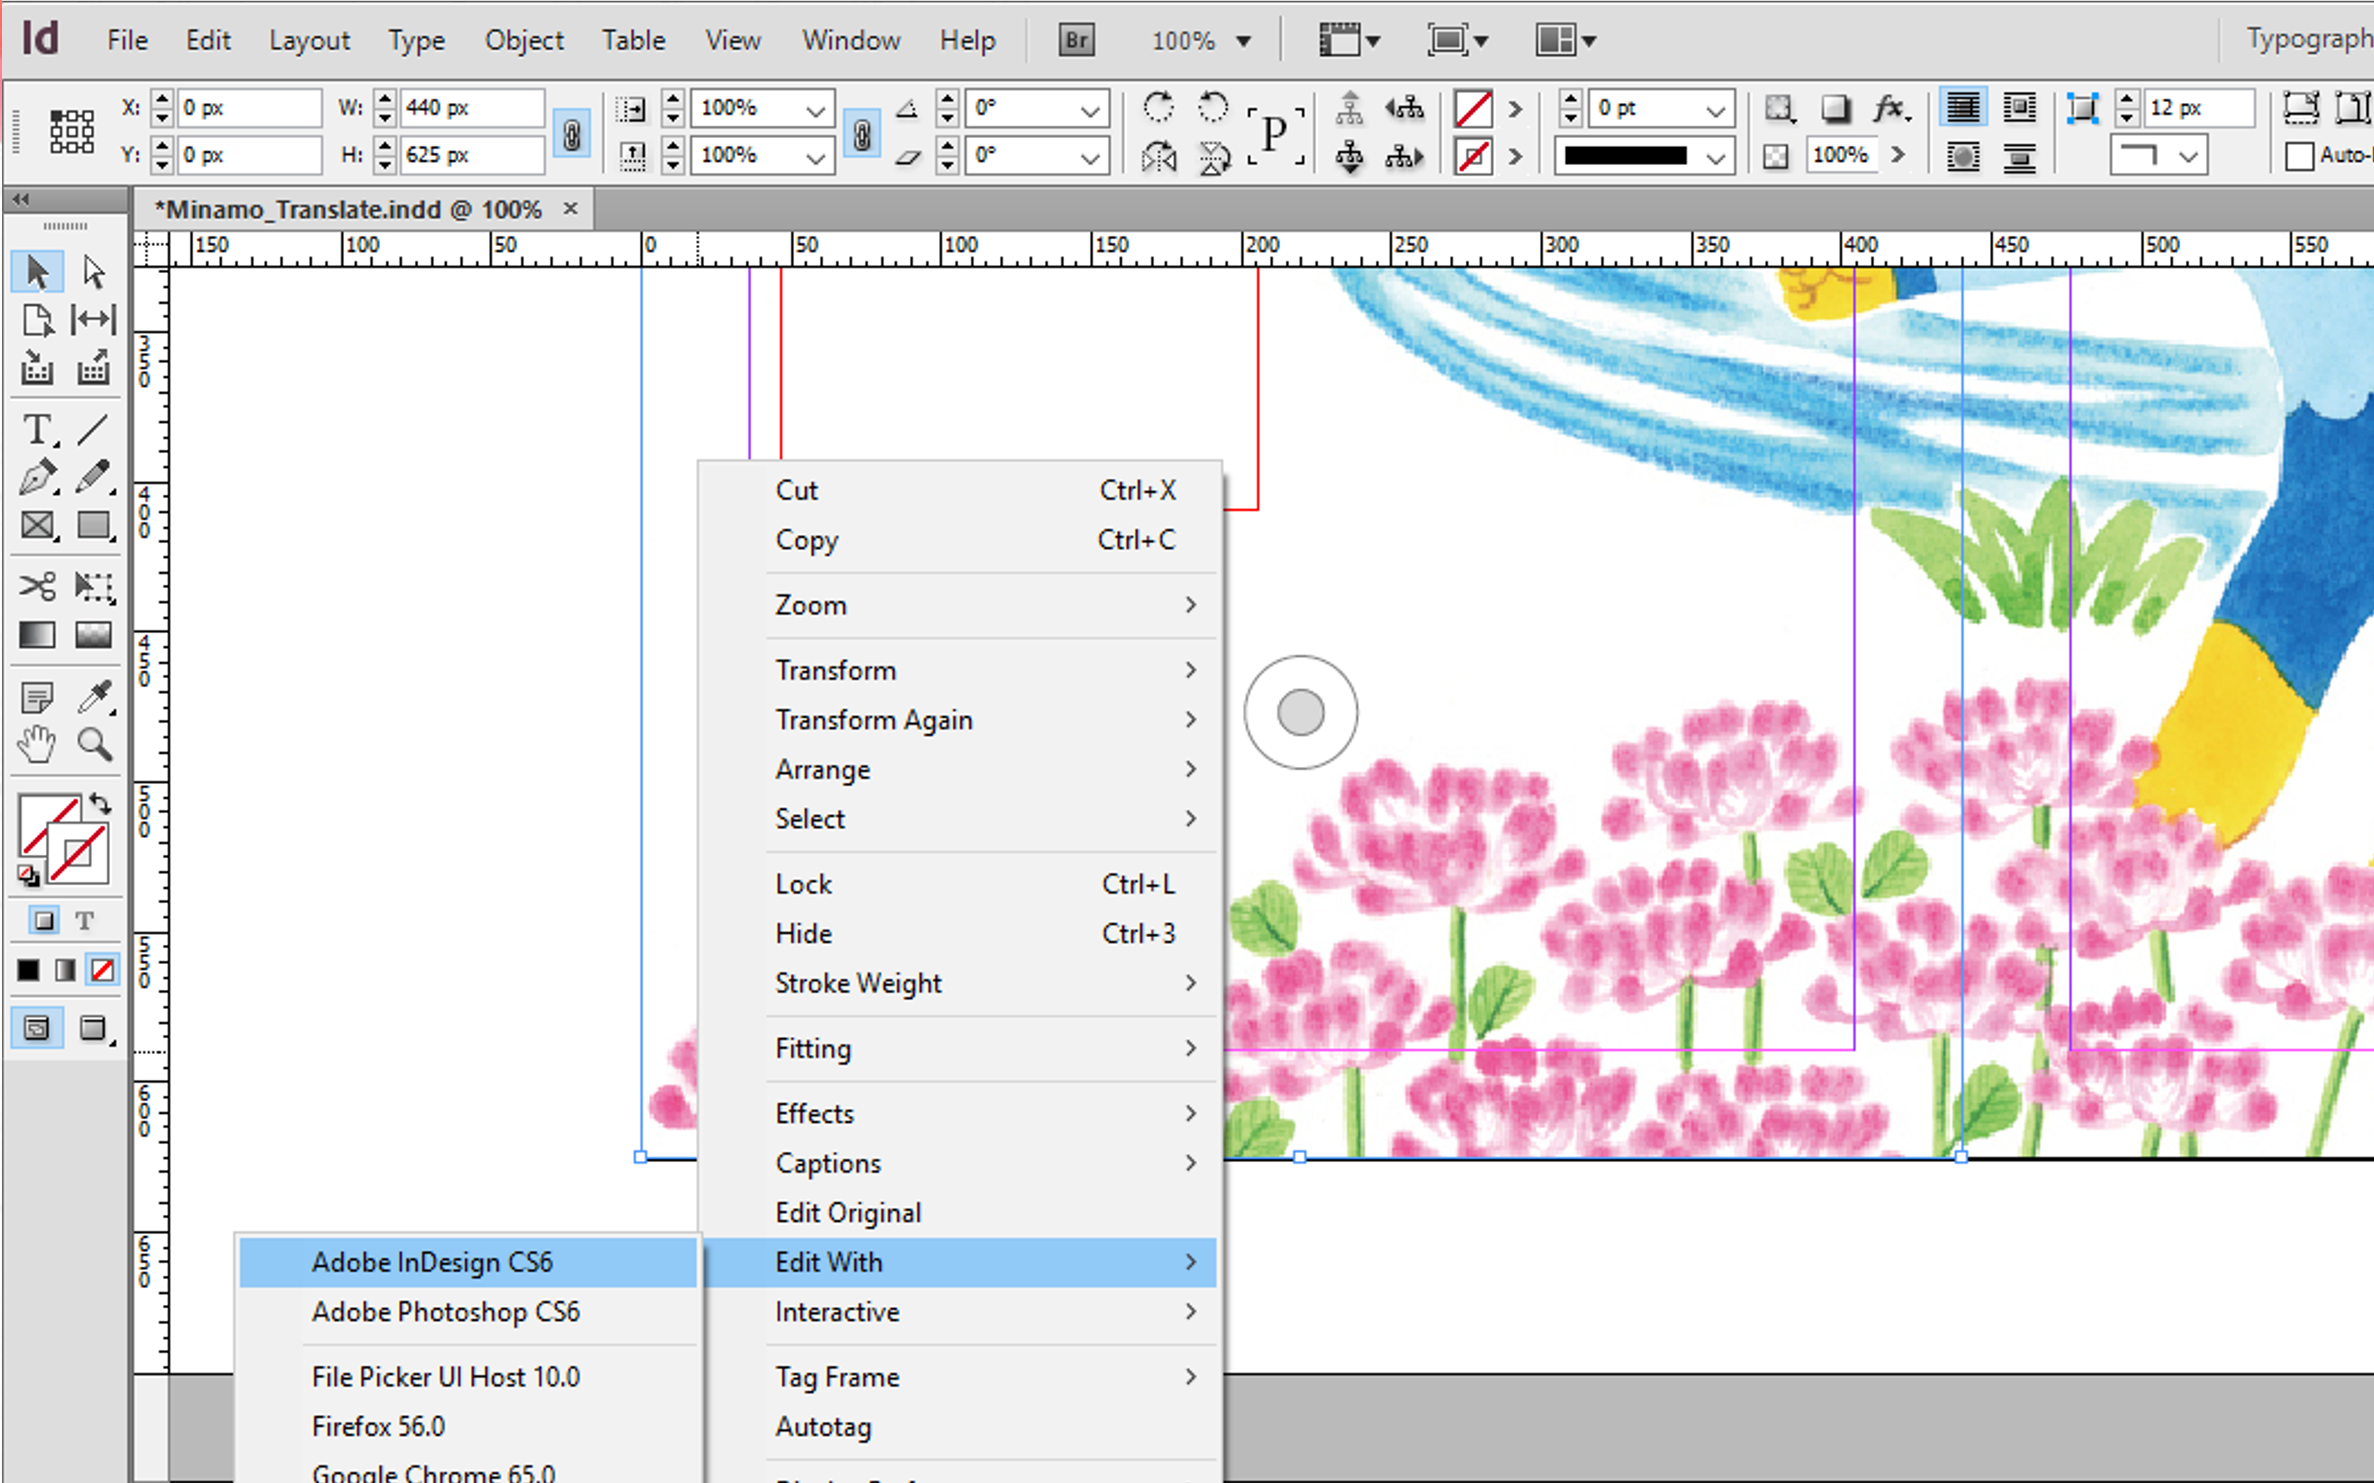
 Localizing the reading order involved first using Adobe Photoshop to erase the pages numbers completely, and then using Adobe InDesign to add real page numbers to the project that could be manipulated. Photoshop and InDesign work seamlessly together, and you can edit an image from InDesign at the same time right in Photoshop without doing any file juggling by Right Clicking > Edit With > Adobe Photoshop. When you save within Photoshop, the changes will instantly be reflected in InDesign. Couldn’t be simpler.

I also needed to go into the HTML of the webpage to change how the reading panel behaved. To my surprise, the code for the webpage was very well commented — in English, no less. It was a simple matter of renaming files and changing a few attributes.
For places where the margins were very narrow and I didn’t want to cover up any of the illustrations, I used the Pen tool in InDesign to create custom borders around the illustrations where no text was allowed. This saved me from having to resort to awkward line breaks or squished text. You can find a great tutorial on how to do this here. The final product looked like this:

If I did it over, I might make the border a little bit further from the picture. But, not too bad for a proof-of-concept! While we’re on this page, if you read my English translation you may be thinking to yourself, “What on earth is a ‘milkvetch’?” Or maybe it’s just me. In any case, I went back and forth on whether to translate the flower’s name literally, or just localize it to “flowers”. In the end, I decided that since this book is meant to be showcasing specific things found in Gifu, I should use the flower’s real name. However, I did try to make it clear that it is, in fact, a flower.

And that’s pretty much it! I’m glad I was able to do this project. It was nostalgic seeing all these places in Gifu again and reading about them. I hope I’ve done Minamo proud!
Mini-Portfolio for Advanced CAT Tools
This semester at MIIS, a lot of focus was put on learning how to use different Computer Assisted Translation tools and Translation Management Systems, as well as developing skills to learn any programs we might meet in our work.
Our most ambitious project by far was training a SMT Engine using the Microsoft Translator Hub. Our group decided to create an engine that would be able to machine translate Playstation system instruction manuals. To look at our project in detail, you can check out our statement of work and our presentation on lessons learned here, but it will suffice to say that the scale of the project greatly exceeded our initial expectations. We had to use PDF versions of various Playstation manuals to align, and the English versions differed from the Japanese versions at many points. Hours were spent on just alignment.
But eventually we ended up with a decent engine! With a larger library of correctly aligned files and use of human post-editing, our group decided that an engine for Playstation manuals could be feasible with the proper up-stream preparation.
We also experimented a bit individually with ModernMT, and open-source translation engine option. This was a pretty interesting experiment that required installing Linux and a lot of troubleshooting for things I had never encountered before.
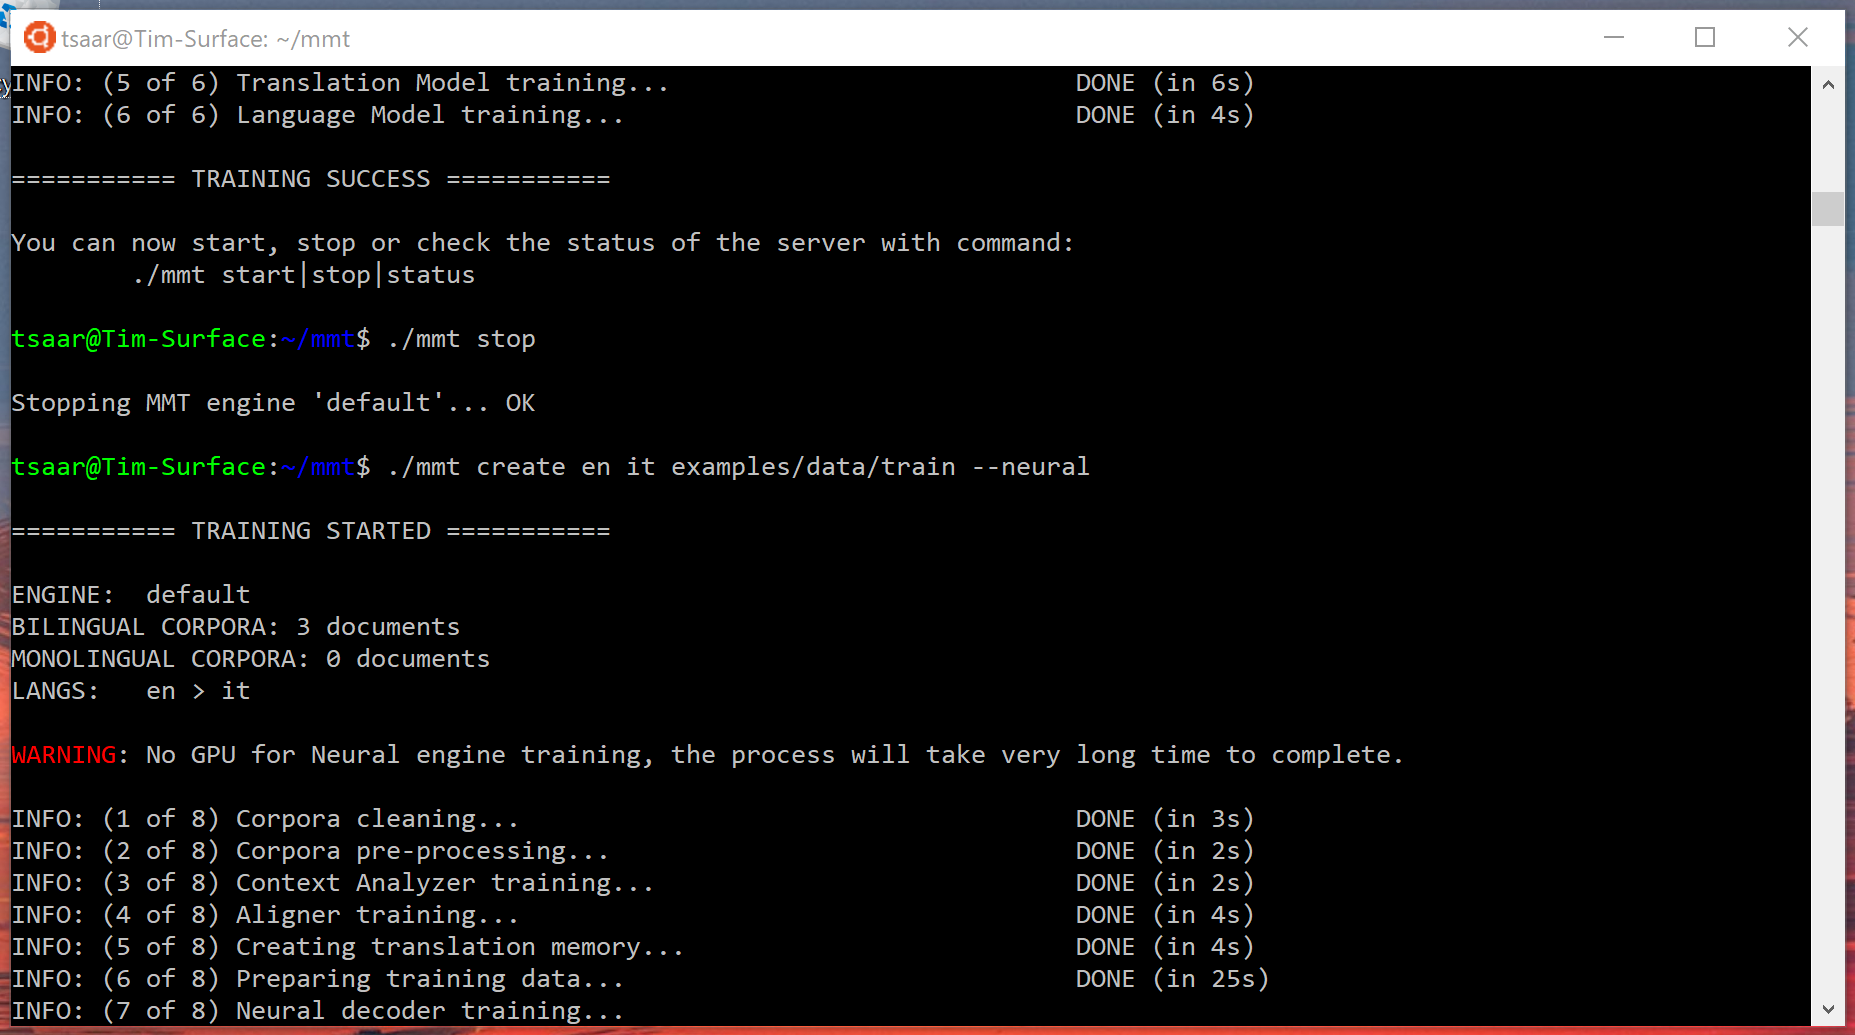

All things considered, I was pretty pleased with the results! By the end of it, I had a working engine, and the Linux command line did make me feel rather hacker-y.
Lastly, we each made an instructional video for any tool we choose that could help in a localization workflow. I chose to do mine on the “Automatic Domain Terminology Extraction System ‘Gensen Web'” developed by the University of Tokyo Library System — a tool for extracting terminology from Japanese documents, including PDF. It’s a pretty simple tool, but if you want a head start on working it, please check out my instructional video found here.
I hope that the different guides that I’ve posted this year have helped you out! I don’t plan on posting much over the summer, but if something comes up, I may. Looking forward to learning and sharing more in fall!
Translation Management Systems: How does GlobalLink measure up?
Today I had the pleasure of participating in an introductory course of TransPerfect’s new TMS: GlobalLink. Besides the swanky certificate they gave me for completing the course, the folks from TransPerfect gave us a two-hour demonstration on GlobalLink to let us know exactly what their new product is about.
![]()
Behind all the talk about all the different features they were implementing in GlobalLink, it did seem like TransPerfect was addressing all the problems that I (and my colleagues) have been complaining about for what feels like ages. Their Query system for translators to get their questions answered while never leaving the TMS; the integration with various APIs; quotes auto-generated; parsers; support for on and offline work; the live previews of target documents; and the planned support of tracked changes at a segment level.
I was impressed.
The next closest TMS that I can compare it to is XTM Cloud — a TMS that I hadn’t touched on yet, but recently was able to try out for a short project. XTM also promises automation, translation and review in context, and a cloud-based system.
![]()
I enjoyed using XTM, and their pricing packages are competitive, offering trials and different pricing. It’s easy to use, flexible, and supports mobile. A case could be made for both TMSs, and you should certainly take a look at both thoroughly before deciding.
However, there is one thing that GlobalLink offers that I thought was truly innovative and exciting: modules.

The idea of picking modules for different features is very intuitive, and promises to match well with the current agile development trend. Of course, I’ll have to wait to get my hands on it before making a verdict, but that combined with the already impressive suite of features that GlobalLink offers makes it a TMS to watch closely.
TMS Recommendation to Management
In a previous post I discussed briefly the needs you must consider when picking a Translation Management System for crowdsourcing, as well as the best practices to put into place when using that TMS. Today, I’d like to compare a handful of TMSs to see if we can find the best choice for your own projects.
I chose Lokalise, Smartling, Transifex, and PhraseApp as my candidates based on word-of-mouth around campus and my own research online, and compared them using tools on Capterra and FinancesOnline. Where I could, I took advantage of free trials to try them out myself.
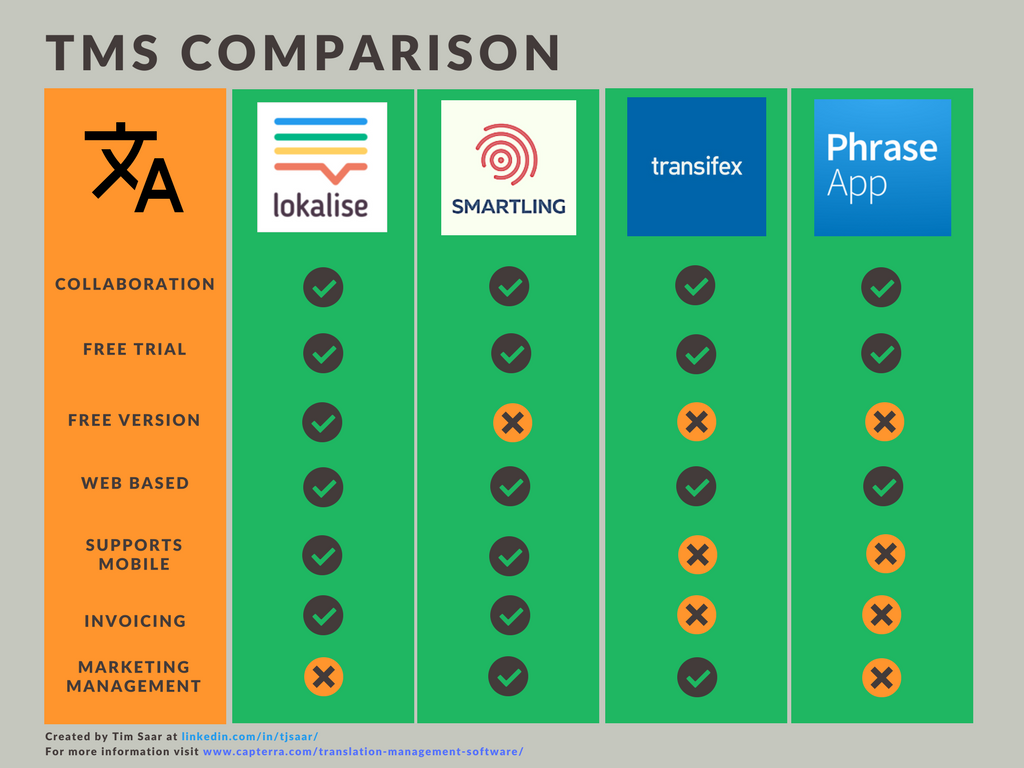
Removing obvious things like Translation Memory support, I made the above graph based on features I thought were the most important based on my personal experience and education — granted, I am a poor grad student, so my needs might differ some from yours.
When put like that, the two standouts are easy to see: Lokalise and Smartling. Both Lokalise and Smartling have very easy to use interfaces, and it’s a snap to get started with either without reading lengthy documentation or tutorials. Both offer robust TM and termbase support, and well as options for online collaboration. More importantly, both offer options for collaboration and web-based translation, eliminating the need to install programs and juggle spreadsheets.
However, though both would be great for certain projects, there are a few areas where Smartling comes out on top. Smartling seems much more geared toward large projects and companies, offering live training and a variety of review methods, not the least of which is allowing translators to see their translations in the finished product as they work. It also offers support for talent management, as well as options for marketers. Though both Lokalise and Smartling could get the job done, comparing all the bells and whistles side-by-side, Smartling wins out handily.
That all being said, it would be remiss of me not to mention a huge, often deciding factor: the price. Smartling is more expensive than Lokalise by a large margin. Putting aside Lokalise’s limited free account option, it starts at $40/month. Smartling starts at a whopping $200/month. However (and it’s a big however), both Smartling and Lokalise offer an Enterprise version with custom pricing. As Lokalise’s next highest option is $400/month and Smartling’s is $800/month, this could be a case where the larger the operation (and the budget) is, the more it’s worth going with Goliath over David.
Bottom line
If you’re looking for a product and service that promises to deliver everything you could dream of in a TMS — and if your budget can stand it — I recommend looking into Smartling.
If you’re just looking to do small-scale translations, or just don’t need all the features of Smartling, you should look into Lokalise’s free version and see if it fits your needs, and then go from there.
The real bottom line, though? There are almost as many different TMSs as there are businesses that need one. If you have the luxury of being able to shop around, your absolute best bet would be to try a few of the top contenders and see which fits your project best. Hopefully my posts have helped you get a head start!

LinkedIn
Plugin created by StressFree Sites