In Website Localization, my favorite course of the entire semester, my friends and I decided to use TranslatePress plugin on WordPress to localize the landing page of Lyft, our content donor, into Chinese.


We decided on this final project because we wanted to get more familiar with building a website on WordPress, to learn how to recreate a slider on WordPress, and to learn TranslatePress, a new localization plugin we didn’t cover this semester. .
Our project involves 3 stages: preparation, re-creation, and localization of the website.
For preparation, we…
- Downloaded all the image files from the Lyft official landing page with the inspect>resources feature on Safari. Compared to Chrome, Safari performs better in providing previews of the resources, making it easier to identify images.

- Translated pictures using two free online photo editing platforms: Meitu and Pixlr. We used the airbrush feature on Meitu to erase the original texts on the images and add Chinese translation to it. Hindsight is 20/20. It didn’t occur to me until we finished editing the images that we could actually change the sample user on the screenshots. Instead of simply translating the English user name into Chinese, we could have created a Chinese user to appeal to our target audience better. That’s something we can think about in our future software or website L10N projects. We then turned to Pixlr to merge pictures (using the “open image as layer” feature.)

- Pick a theme without a large embedded header image. We picked “Primer” by GoDaddy.


As for webpage re-creation, we…
- Created a site using the resources we collected in the previous stages.
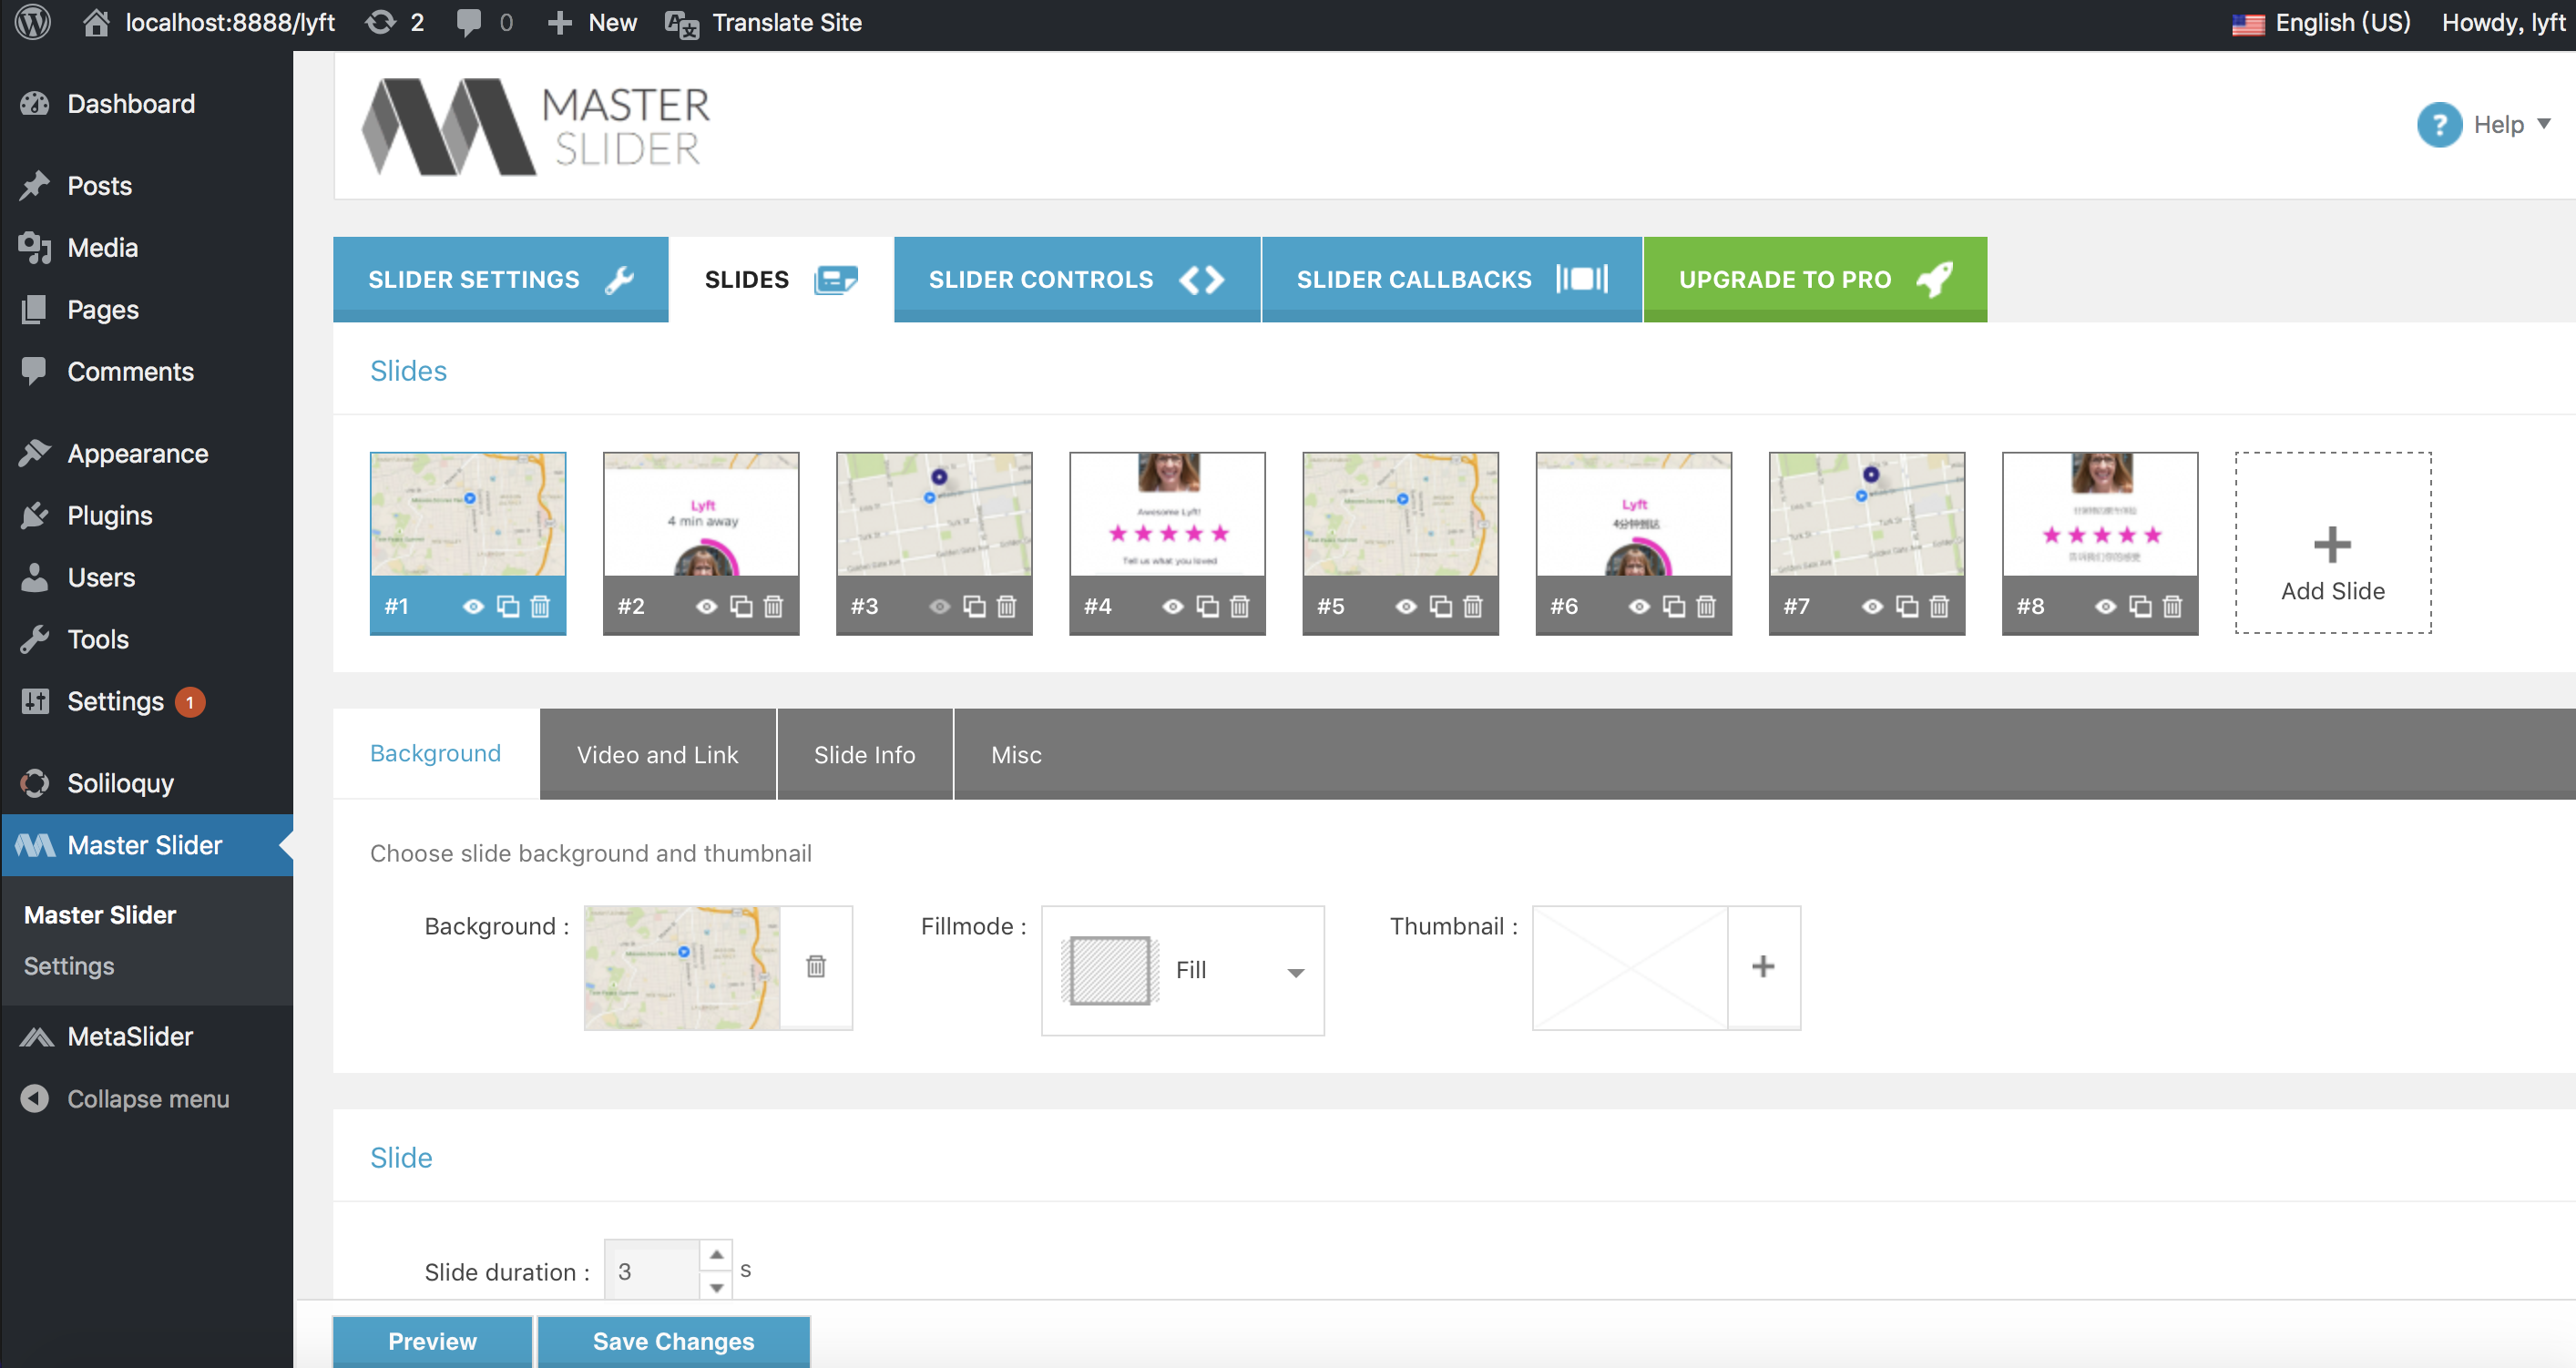
- Added a slider with the plugin Master Slider and adjusted its width, length, and appearance. There are plenty of slider creation plugins on WordPress, but we decided on Master Slider because it has the most detailed slider settings. You can adjust not only the size of your Slider but also that of your images. Moreover, you can even choose a clear background or upload an image as your slider background. Nevertheless, it did take us some time to configure the settings to best present the phone with sliding images – it was just a process of trial and error.

Finally, the cherry on the cake, for the localization of the page, our team…
- Installed and activated the TranslatePress plugin.
- Translated strings by clicking on the Translate Page button. We were then prompted to the Settings page.
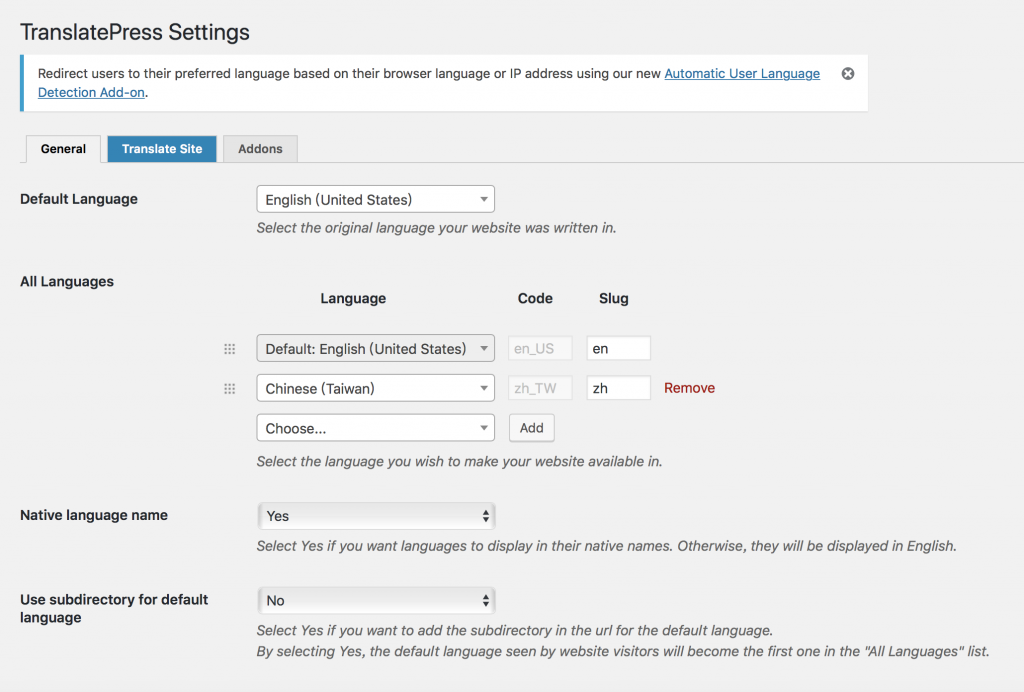
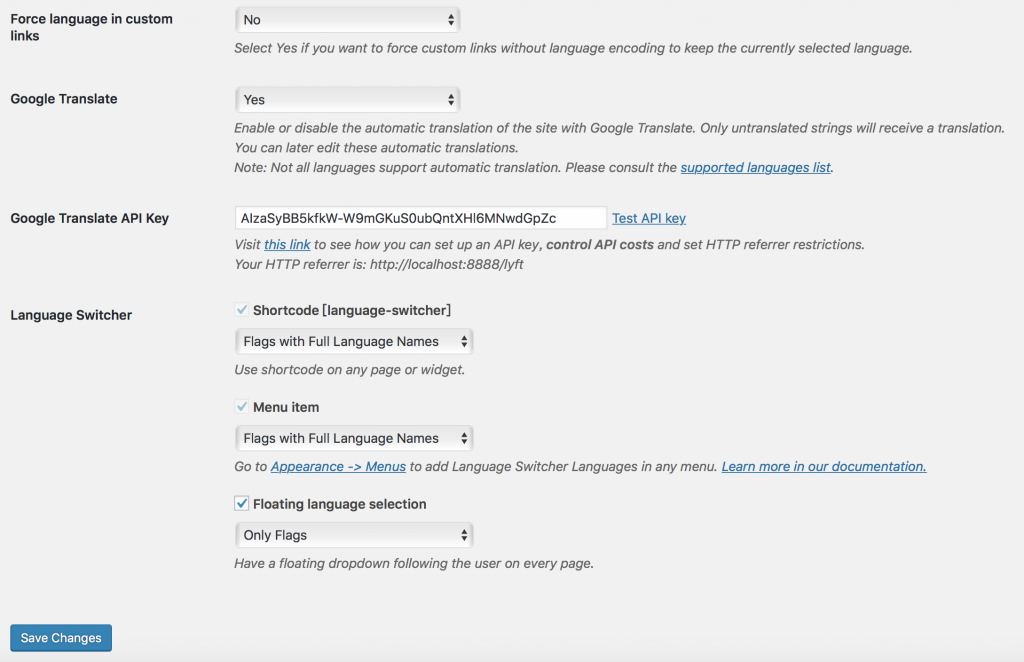
- Configured source and target language and how we wanted to display language options, e.g. whether to present language names in their native languages, whether to use Google Translate (requires api) to pretranslate. We also chose how we wanted to present language switchers from three available options: adding a short code to page widgets, adding language switcher menu items to menu, or using automatically generated floating language selection. We decided to add a drop-down language switcher and a floating switcher displaying national flags.
- Translated strings by clicking on the Translate Page button again to enter the WYSIWYG interface. We moved between pages and strings with the dropdown selector and previous/next buttons and saved our translation before moving onto the next one.


During our configuration and translation stage, we observed some pros and cons of TranslatePress.
- Pros:
- It’s very user-friendly. Even localization laymen like business owners can localize their websites if they have quality translation at hand.
- The WYSIWYG window shows translation right away after users save it.
- Google Translate is built-in and available, as long as users have the api.
- It does a great job at capturing strings on pages. (It captures every string including the copywrite line in the footer.)
- Cons:
- There’s no CAT-toolish functions such as TM and TB.
- Unlike another plugin Multilang, it doesn’t integrate any CAT tool or support TMX export and import.
- Vendor-management friendly functions such as notifications or different-level user accounts are available only on paid add-ons.
- It’s hard to accelerate the translation process by moving between strings because there are no keyboard shortcuts.
- Users have to manually save each string before they can see the preview in WYSIWYG window or move onto the next one.
- Tags are presented in unclear symbols. Users have to look them up in the WYSIWYG window to see what tags they are handling.
- It automatically segments lines separated by hard enters. What’s worse, users can’t merge or split segments as they want.
- No corresponding page is created for target languages, making it impossible to organize translation or present a localized widget like a slider. (Therefore, we could only present our DTP result – translated images in one slider that shows in both languages.)
In conclusion, in what kind of situation will the TranslatePress plugin come in handy?
- When you want a free, easy plugin
- When your contents are all in text or when you don’t need to localize pictures on your webpages
- When you don’t want all the hassle of managing webpages in different languages
- When your contents are not repetitive (you don’t want to reuse/manage the translation)
- When you wish to publish your translation quickly and directly on one platform
Based on our user experience, we like this plugin in general, but we still prefer to manage translated contents page by page and link them to original content.
