During my second year at MIIS, I am very fortunate to be volunteering for the Arctime localization project. Arctime is a powerful subtitling/video editing software developed by a Chinese company. Through out this year, I have worn the PM hat, the loc engineer hat as well as the translator hat to drive the localization, testing, and translation of the Arctime official website and software. I’m very proud to say that our team of seven have accomplished a lot! We delivered the glossary validation project, EN software QA testing project, zh-TW software localization project, WordPress website migration project, and EN website continuous localization project. If you are interested in learning about these projects in details, please find our presentation here. In this article, I will be focusing on our core project—zh-TW Software Localization. We localized .properties file from simplified Chinese to traditional Chinese.

Source: Actime Official Website Feature Page
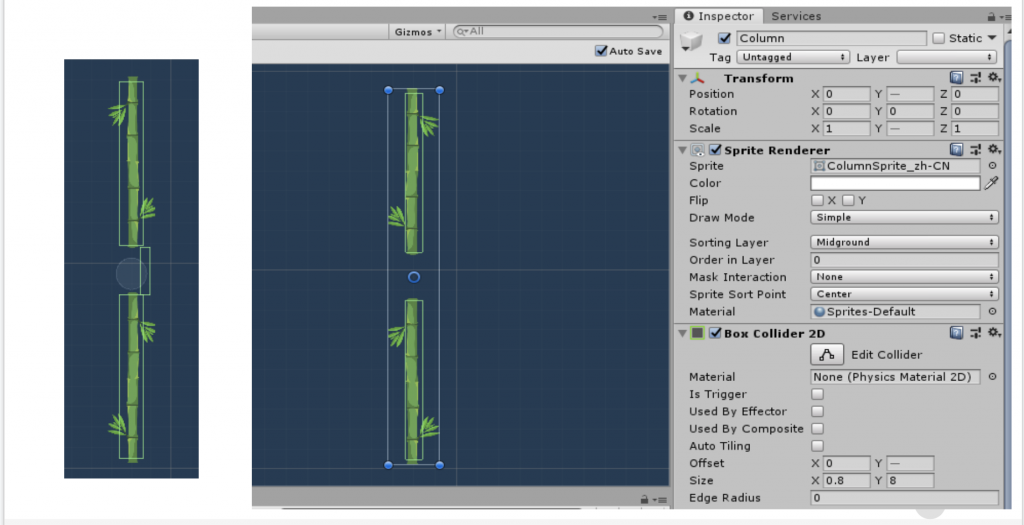
zh-TW Software Localization
Before we took over the Arctime volunteer project, the class of 2019 has laid a solid foundation of externalizing the strings and translating the software from simplified Chinese into English. Therefore, this year we carried on by doing glossary review and client validation to ensure the translation consistency and quality before we start with any other projects, running QA testing on the translated English software, and continuing to translate software into traditional Chinese for users in Taiwan and Hong Kong.
Previous Translation Process
In the previous year, volunteer linguists translated the Java .properties files directly in the Transformer software, a .properties file editor provided by the client. This way, they could save time on creating projects on TMS and importing/ exporting the texts files.
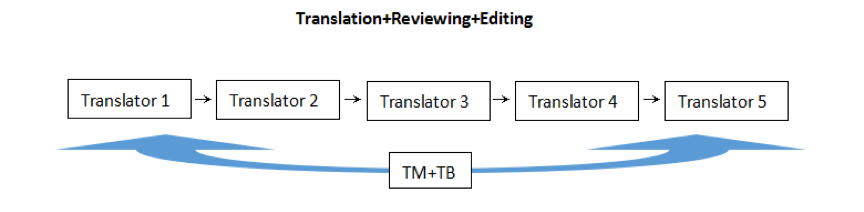
New Translation Process
This year, our team decided to move the translation process into Memsource. Our new workflow include the following steps.
- Unpack the software and collect the source .properties files
- Unescape the codes in the .properties files
- Copy the unescaped texts into .txt format
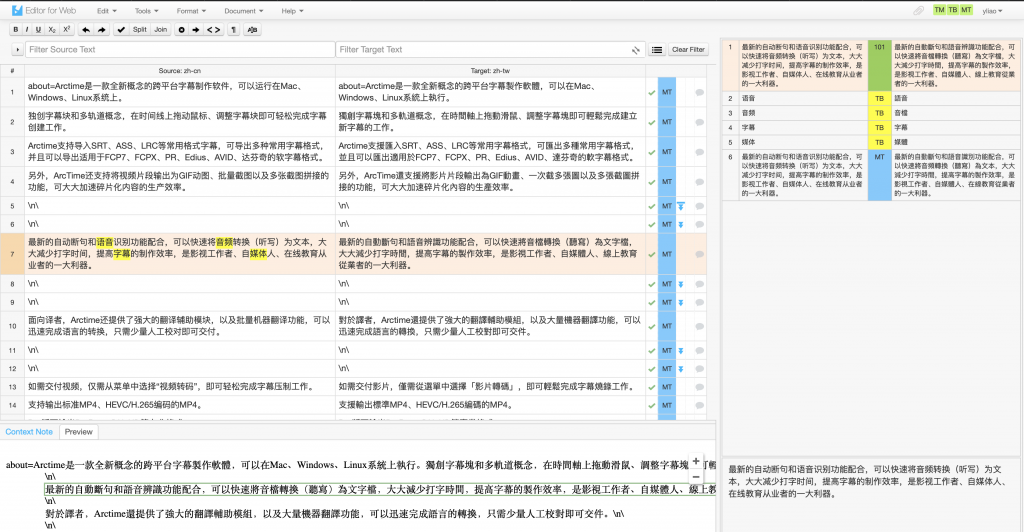
- Pretranslate the project with MT and termbase on Memsource
- Linguists MTPE on Memsource
- Linguists review on Memsource
- Export .txt files from Memsource
- Escape the codes in .txt files and paste them into properties files
- Repackage the software
- zh-TW software LQA testing
At first glance, it might seem that we overcomplicated the process by introducing several additional steps. However, translating in TMS have several advantages:
- Ensure translation consistency across different linguists because TM is stored real-time in the cloud, so when they translate, they can refer to others’ translation to avoid style and terminology difference
- Accumulate TM for the localization of traditional Chinese website and tutorial videos next year
- We can pretranslate with MT with one click on Memsource, as opposed to copying and pasting MT output into each .properties file in Transformer
Deliverables
Due to time and resource limitation, we weren’t able to finish the entire project. We have finished up to the fifth step—MTPE on Memsource, so the team taking over the project next year will need to continue the process from reviewing the translation. Yet, my teammate Shiyu and I have done a pilot run to test if all the listed steps work, and we have documented and solved the technical difficulties during the process, so the team will be able to continue the project smoothly next year.
Technical Difficulties
During our pilot run, we ran into quite a few issues we hadn’t foreseen, including:
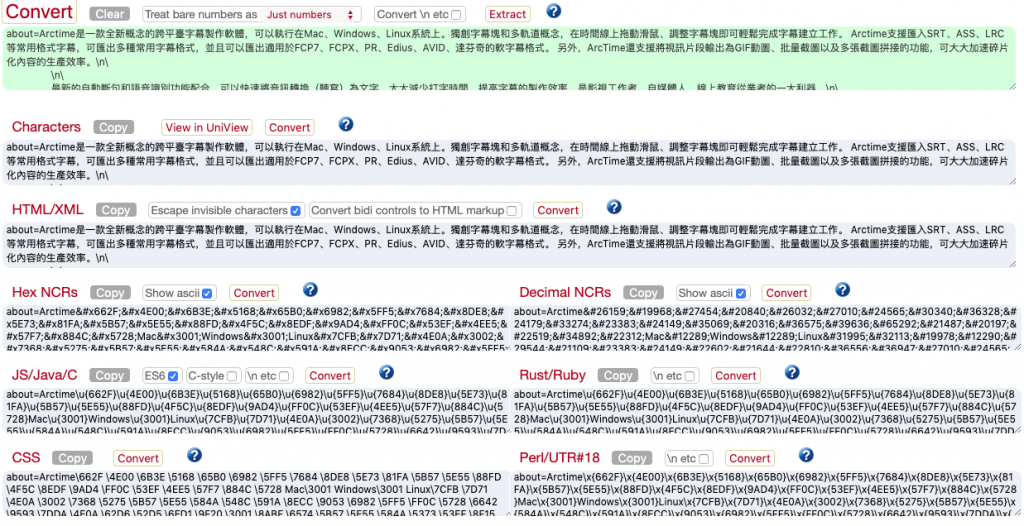
- Finding the right converter to escape and unescape codes: All the online character escape converters more or less introduced some extra characters when they convert codes, which later led to the corruption of codes when we repackaged the .properties files. Therefore, we had to pick the one which introduced least changes and manually clean up the codes after conversion.
- Memsource parsing the .properties files incorrectly: The unescaped .properties files shown up as garbled on Memsource no matter which converter we used. Therefore, we decided to paste the codes from the .properties files into .txt files and import them to Memsource instead. This inevitably adding two manual steps, but this is already the most time-saving way we came up with.
- Packaging the translated files back into software: After translation and incorporation (the process of putting the translated file back into the folder and build into software,) no matter how many times we tried, the software wouldn’t run. It was because we didn’t keep the original jar file in the folder. The correct way of packaging file is as below:
- Rename the original string package xxxx.jar file as xxxx_original.jar and keep it in the package (Path: Contents/Resources/Java,)
- Zip up the translated and escaped cn, e, and META-INF folders into a new xxxx.zip string package.
- Change the xxxx.zip name from xxxx.zip to xxxx.jar (the original string package name.)
- Put this new xxxx.jar file into the package (in the same path: Contents/Resources/Java.)
Final Thoughts
During this year of managing the glossary review/validation project, the software localization project, and the QA testing project, I have gained and learned so much about Java software internationalization and localization. Yet, my biggest takeaway in this type of volunteer project is to work as closely with the client as possible.
Ask the client whenever you need help regarding the product or process. I was reluctant to ask the client for help when I couldn’t find contexts for the terms which our linguists found confusing. I also spent hours and hours experimenting how to package the translated files and build the software. However, with the client’s guidance, I was able to solve the issues real quick. For those who have experience working at an LSP, the service mindset tends to stops us from asking clients questions and prompting us to solve the problems internally. However, our collaboration with the client on this volunteer project is different from the traditional buyer-service provider relationship essentially. The client treats our team as a partner and is really willing to teach and help us, so instead of trial and error by ourselves, we should go to our client for help when we need it. After all, he is the one who coded the entire software and knows in and out about it. We should treat him as our partner, someone we can go to and ask for help as long as we need it.