It’s always good to do what you like and like what you do.
How to get a “good” idea?
For most people that I know of, no matter it is for group project or just choosing what they want to add on their online portfolio, etc. they always say: oh god, what am I supposed to do? I don’t have any creativity! Good ideas are not always attracted by me!
If you think this way, I would say you are wrong. In fact, we are always surrounded by tons of ideas every day! You just don’t think those CRAZY ideas are ideas that you could use in your project by just making them fit into reality.
When we first get a chance to think about what we are going to work on for our Multilingual Desktop and A/V Localization class, I immediately thought about a TV series that I really like – Stranger Things. I want to create an awesome poster for my favorite characters! But what exact effect I want to create? I started googling and found this poster online:

Basically, it’s several layers overlapping each other and use some effects and tools in Photoshop. Changes of settings could be a really challenging part for me to figure out.
Workflow – How to finish this job before you start?
After having the idea, what’s the projected workflow would be? I firstly need to find the resource online, and then try to find the tools I could use and settings I should change in the process and then try to localize it into Chinese version in this case.
Find resource → Work in PS workspace → Adjust settings → localize into ZH version → QA and final adjustment → export
Work in Photoshop
-
-
-
Use “screen” blended option to adjust the effect
First of all I found all these pictures as the sources that I might use for my final project.


-
Use “Magic wand tool” to extract image from the background
There are a lot of tools you could use to select certain parts of a picture or image: Quick Selection Tool, Magic Wand Tool, Lasso, Marquee tool, etc. After testing all of them, I found out Magic Wand Tool is the most convenient one to use. There is also Content Aware you could choose once you are using Magic Wand Tool, with which the edges of the image could you extract could be more natural.
Take the logo as an example, firstly when selecting with Magic Wand Tool, the letters are not selected instead of the background part. When this is the case, you could hold Option key and then select again. Sometimes this could perfect select the reversed part of the image.

Then you choose “Content aware to get the image”, click enter, done. You can do the same to Eleven’s image:

-
Combine several pictures into one PSD file
There are several ways you could create new layers to combine different pics into once PSD file.
a. Create a PSD file with background image in it. Then copy and paste the adjusted image in Step 1 and layers will be automatically created.
b. Drag the saved image after adjustment directly into the PSD file. Layer will be automatically created.
c. Create layers and import image to it. -
Adjust minor effect
After you put all of the pictures together, Blended options are used to do experiment for the desired effect. Finally, I could the “screen” mode is really helpful to make Eleven’s image kind of faded inside. Also, H/S adjustment could help to polish the effect, too.

This is what the final effect looks like -
Localize into ZH version
Imagine this image is not created by me, your client just give you the image file, how are you going to erase the English character on it and create the localized version? Magic Wand Tool! You got it!
The most difficult part is that you need to mimic the visual effect. What I did is to use Color Picker (all this online tools are available once you googled.) to find the most similar color, say, the blood red, and you can enter RGB value to get the color in Photoshop. Then by changing the Fill to 0% on the sidebar in the Character column, you could get the transparent effect in the character.
The localized version looks like this:
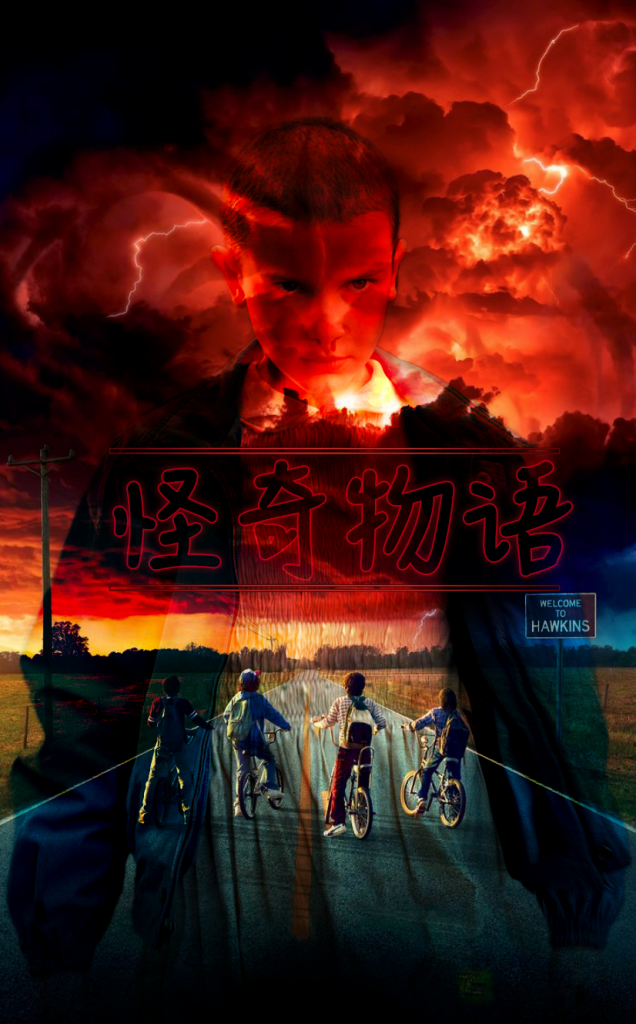
-
Export as PNG, JPEG
Once you finished the work, you could export the PSD file as JPEG, PNG, etc. as what your clients require.
-
-
Best practices
-
-
-
Rename your layers every time you create a new one.
This could prevent you from not knowing which layer is working as which. Also, when you hand this to your client, they might want to know how you finished this project.
-
Be organized when storing your own working file.
When you are working on a project, always remember to create a backup as the original file you have and working on the “Working” folder.
-
Use Google whenever you have a question.
You might not be able to know everything about a software. Just reach out to Google to find whatever you need. It is a problem solving skill that you might want to practice and show to your potential employers.
-
-

Recent Comments