
As the world becomes more and more digital, localization moves further away from the paper. This is especially the case in certain industries, like entertainment. It is important as localizers to understand how to work with these different formats, ranging from simple videos to insane visual effects.
This semester I took a class on audio-visual localization and within the first couple weeks I got to try my hand at Premiere Pro. The basic step in understanding how to internationalize/localize in a new platform is understanding the platform itself. Our first big assignment was to create an original video, introducing and promoting ourselves.
I can’t bring myself to do things in a normal way, so I knew I had to get creative. The idea came to me to try and create a video where I cloned myself and have a full-on conversation about my journey to the Middlebury Institute of International Studies.
I used an incredibly useful Youtube tutorial by Peter McKinnon: How to CLONE yourself!!
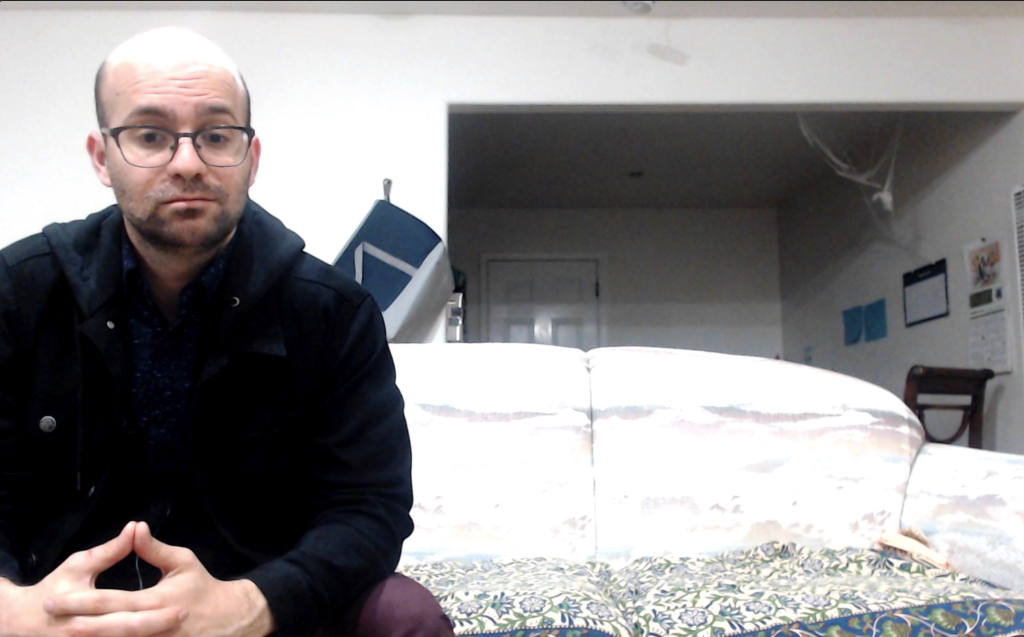
Basically, the first step was to shoot the footage, which I decided to do on my couch because there was enough space to fit two of me and still leave some space in between, making sure not to move the camera at all between shots:

The next step was to combine the shots into one. As the tutorial explains, the best way to do this is by drawing a mask around the top layer, which allows the bottom layer to smoothly come into view. You can adjust the opacity to make sure the spacing is ideal:
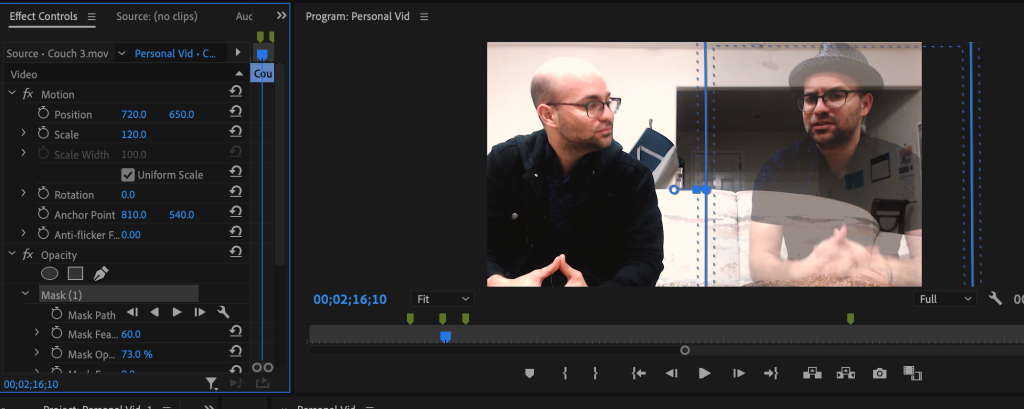
The cloning looked really good, except you could see a very obvious line down the middle of the screen where the footage was spliced together, and the color was a pretty obvious difference as well, since your body casts a distinct shadow on each side. To fix this, I adjusted the Mask Feather, which would sort of subtlely nudge that line over and have it fade into the next section. Finally, adding an adjustment layer on top (New > Adjustment Layer) helped to give the video a nice color and get rid of those obvious color differences.

At this point it was looking great!
There were, however, some sections that didn’t quite line up, such as in the back and forth parts of the dialogue, and I had to do some fancy splicing or overlaying of B-roll and sometimes adding in a narration to make a smooth transition (in other words, don’t look under the hood).
I got my B-roll footage mainly from pexel.com and I got the background audio from bensound.com. In our class we learned how to adjust the audio to ‘duck’ when dialogue was present.
As a final touch, I also took advantage of Premiere Pro’s transcription feature, which allowed me to generate subtitles automatically and apply them to the video. Of course, there were some errors, which I had to fix manually, such as the first line of the video where I say “First of all, hey to everyone watching this video” and it generated “First of all, I hate everyone watching this video.” That wouldn’t have gone over well…
Of course my next plan of action is to localize those subtitles! But that is another project for another day.
Here is the final result:
Thank you for reading! I hope you enjoyed hearing about my journey to MIIS!
