Japanese quiz shows are uniquely creative in the kinds of fun questions that pop up, and as a huge fan, I’ve been keeping up with quite a few of them for years now. One in particular had a fun segment that consisted of watching a ~1 minute video clip to look for “oddities” that happen throughout it, and this was what I decided to take on as a localization project into English, where I used a combination of Photoshop and After Effects to mask and replace the on-screen Japanese text with my localized English translations.
The source video I used has 1 minute of intro and showing the clip to find the oddities in, followed by around 2 minutes of revealing each oddity (view the original Japanese version here, and my localized English version here). Although I wasn’t able to figure out how to cleanly localize every last bit of Japanese that appeared on-screen, I’m very happy with what I did accomplish and in this post will discuss how I tackled certain challenges, as well as the larger implications of these challenges for video localization in general.
Please feel free to check out a short video summary below and read on for more!
Note: This project is a proof-of-concept only and does NOT represent Fuji TV.
Contents
Overview
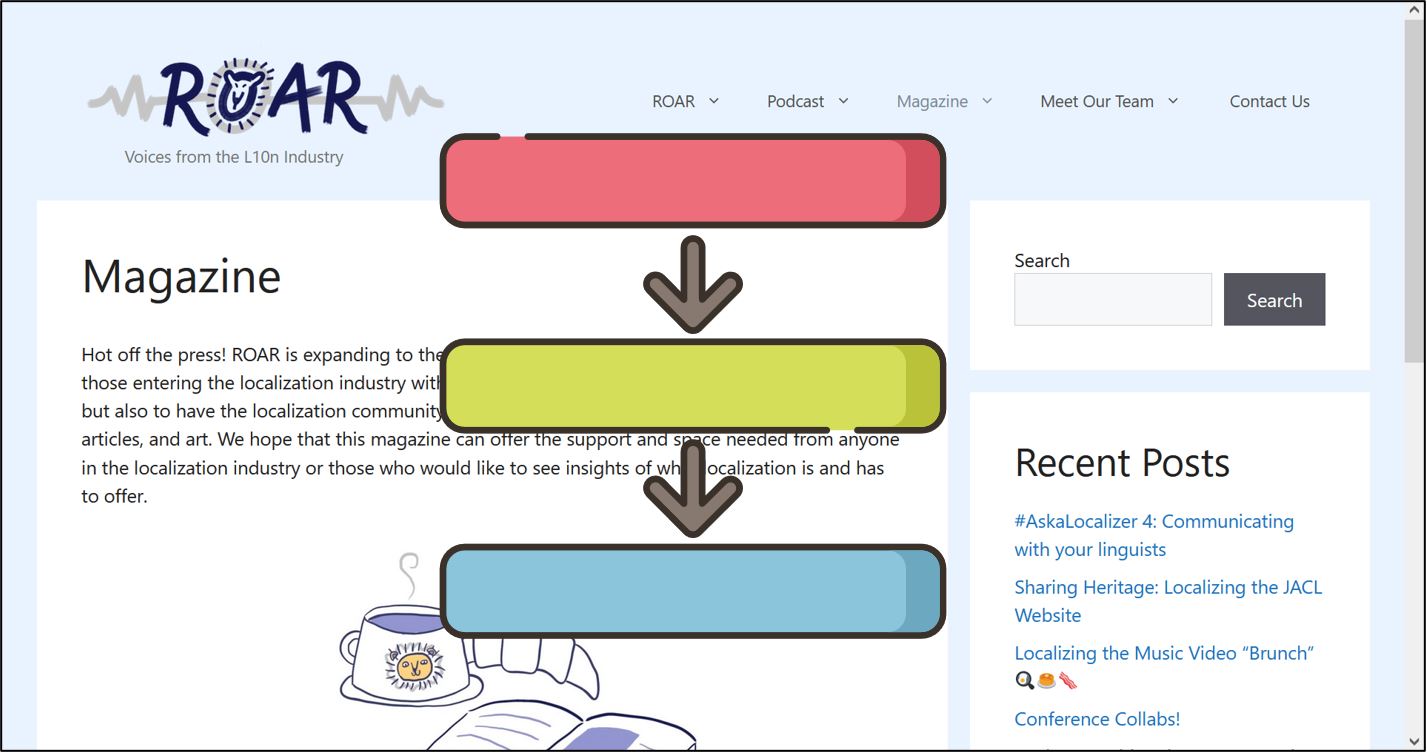
The overall process for the project roughly went like this:

The first two steps can be summarized as: extract all on-screen Japanese text into an Excel sheet (known as a “picture list”), then translate into English.
The third step makes up the majority of what this post is about, hence why it’s enlarged in the diagram – let’s go through what was involved in the whole process.
A Series of Mini Projects
Localizing this video can be best described as a series of mini projects that consisted of two main things:
- Mask the original Japanese text in a smooth way
- Embed the translated English text, replicating the formatting of the Japanese text
Nearly every section I did this process for required its own solution, so at times I found it to be almost like a puzzle to solve. I’ll go through the techniques I used, roughly in order of easiest to hardest (including what was too difficult for me to pull off).
Simple Solid Overlay

A couple sections only required a simple solid color rectangle overlay to mask the source text, like the “Finish” screen. Pretty quick fix, but it’s worth noting that putting the English text in did take a bit of time because of having to search for a font that replicated the original style (and was as close to the smaller text below it as possible, which was already in English to begin with in the original video).
Bouncing Frames to Photoshop
For scenes that required something a little more advanced, I exported a static frame into Photoshop to edit there, then re-imported it to After Effects after I was finished. One example of this was the countdown right before the main clip starts, where the Japanese was embedded in a text box with other graphics. A combination of Photoshop’s content aware fill, clone stamp tool, and healing brush tool was used to cleanly remove the text (which took a fair amount of time), followed by reinsertion of the English text and re-import into After Effects.
Something that’s quite convenient is that even if you edit the Photoshop file afterward, the corresponding layer in After Effects will auto-update with the change, which would be useful for in-context review purposes when changes are made after the original work was done.
Animation in After Effects
In addition to editing in Photoshop, some scenes required more involved animation after re-import into After Effects. For example, when revealing all the oddities in the clip, the cards for “Oddity #1”, “Oddity #2”, etc. each animate in with a blur effect. After spending some time, I found that the “Directional Blur” effect with certain settings came closest to replicating how the original looked, and I was able to keyframe the blur along with the horizontal motion of the card into the scene.
Another scene worth mentioning was the outro, with expanding text against a static black-and-white brick background. This could’ve been another candidate for content aware fill in Photoshop followed by lots of clone stamping to clean it up, but something funny I noticed was that the background actually repeats itself and the top and bottom halves are identical, making it so I could simply copy and paste the parts not covered by the text to mask the Japanese. Pretty convenient!
The Title Sequence
This was a doozy. If you look closely, both the text and background image (of the four guys) move/zoom throughout the title sequence, making it difficult to get away with a simple Photoshop export/import for masking.
My first thought was to create masks around the text and very carefully keyframe the masks to adjust the shape for the text’s motion as it slowly expanded, then use After Effects’s content aware fill. Well, even after nearly an hour of adjusting keyframes for the masks, the result was simply not acceptable, and even considering there would be English text overlaid on this, the blurring would still be way too noticeable by any measure.

What I did instead was something perhaps even more tedious: I pieced together a static frame of the background image in Photoshop of the four guys without any text. There’s a couple frames before the text actually appears on the screen which gave me most of the image, then from there I used a lot of clone stamp / healing brush tool to paint over the rest.
I then overlaid this onto the source video, meticulously keyframing the motion as to exactly cover the original as it moved. After that, I put my English translation in, but replicating the text treatment in itself was another challenge. I had to:
- Find a similar style font for the text in English
- Stratify the letters in the top row like the original Japanese did, which I accomplished through adjusting the baseline shift of individual letters
- Keyframe scale and position to match the original
- Add the “glow” effect around the text (the original having this is probably what made content aware work so poorly when I tried it), which I accomplished through playing around with drop shadow settings
- Add the “lens flare” effect visible on the “FAKE5” part. This was interesting to explore, and I got a result I was satisfied with by generating a lens flare with the built-in After Effects feature for it and heavily adjusting what I got with gradients and color settings

Rotoscoping/3D Camera Attempt
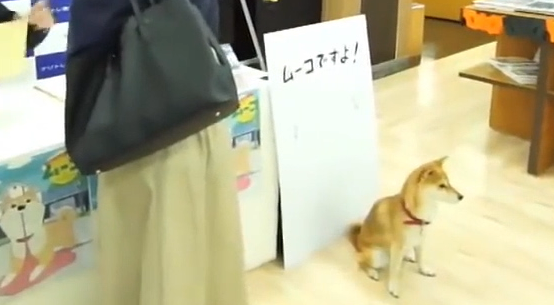
The techniques described up until now were enough to localize all essential text that the user would need translated in order to follow along. I did, however, want to challenge myself by attempting to localize some of the non-essential text, like what was on the poster above the dog midway through the video (I thought it may be useful to do this because it’s connected to one of the oddities).
This proved to be much harder than anything else I’d done, and I was not successful. However, here is what I imagined the process to be like:

- Use rotoscoping and AE’s content aware fill to mask the Japanese text on every frame as the camera pans across the room (I was able to get this far – see the GIF above – but it took a very long time).
- Use rotoscoping to create masks for the humans that cover the poster throughout the scene (I didn’t do this since I saw how unfeasible the next step was).
- Use the 3D Camera Tracker to analyze the scene so that text can be placed and tracked on surfaces. This is where things would hit a roadblock. Probably because there are so many things going on in the scene, the camera tracker failed to “solve” the camera no matter what I tried (see picture below), making smooth integration of target text impossible.
- Place English translation on the poster and put it behind the layer rotoscoped out in step 2.
I can imagine trying other tactics in place of step 3 such as motion tracking, but that too would be hindered by the same issue of too many things covering up the poster throughout the scene, preventing After Effects from being able to consistently track the four points it needs to make motion tracking possible.
Lessons Learned
If there is anything to be learned, it’s that video localization can take a lot of time, so turnaround times are going to be longer (it’s a relatively common issue that a client will not understand why a vendor needs so long to localize video assets!). Anything that involves rotoscoping could get prohibitively expensive and time-consuming, as I saw with the little taste I got of it.
The workflow I used for this project didn’t involve too many steps since I was a one person team, but a typical workflow for such a project would include the following steps:

As you can see, additional review steps are required after both translation and formatting. The in-context formatting steps will obviously be quicker if the original video file with editable text is provided, but even with this, there are still several things to consider from a time/cost standpoint:
- Extracting the source text for translation in a CAT tool – there are scripts that exist such as aetextio for exporting/importing text in After Effects, but if the text has complicated animations there are usually issues with importing back in, so making an Excel picture list may be required (like I did for this project). That’s a bunch of extra work if there’s a lot of text segments to paste.
- Finding equivalent fonts in the target language – although Latin alphabet based languages may all work with the same font, translation to/from a CCJK language would likely require shopping for a similar-style font, which can take a surprisingly long time.
- In-context review can reveal issues that then require an extra cycle to fix – for example, when initially embedding my English translation in this box (see below), I had to go back and shorten my translation due to the uncomfortable degree I had to cram the letters together (by lowering the tracking) to get the initial segment to fit. Although I could resolve this quickly as a one person team, for most LSPs the translator and in-context formatter are not the same person, so an issue like this would require going back through several steps of the workflow starting with a request to the translator to shorten the translation and ending with another in-context review of the implemented changes.

Overall, I learned a lot more about video editing techniques from this project and am happy with what I was able to accomplish in After Effects given the limited time I’d spent learning it before. I have a lot of respect for what localizers do in this industry, and I hope that everyone can come to appreciate the work that goes into good localization, especially audiovisual.
Deliverable
Here’s my final English localized version of the segment (you can also watch the original Japanese video here if you’d like):